Header, Footer and colour customisation for the client interface
Some organisations want to use headers and footers, and colours for the RefTracker client interface pages, that match the headers and footers and colours that they use throughout the rest of their web pages. RefTracker provides a simple process for this but you will need an HTML programmer (usually your web master) to be able to implement this, if needed.
Most customers just want to do one or more of these things:
- You can provide an HTML file for a header by editing Headerclient.htm (and HeaderMobileClient.htm) at System>Utilities>Administration utilities>Template editor text. There are no limitations on what this html file can contain, but it should not be more than a few centimetres high as the important thing is for the client to see the client interface pages content, not just header. Your header can replace the RefTracker header bar if you really want to do that, but if you can keep it, its easier for you and protects you from having to make changes to your header, if the RefTracker menu bar is changed by a new release.
- You can provide an HTML file for a footer by editing Footerclient.htm (and FooterMobileClient.htm) at System>Utilities>Administration utilities>Template editor text. There are no limitations of this html file, not even its size.
- And you can provide a local CSS file that changes anything you want to change about the form itself (such as the font or field sizes) by editing main.local.client.css at System>Utilities>Administration utilities>File Upload download and selecting include/css as the target, and specifying the CSS you want to use with !important. You just need to add your changes to this file – no need to re-specify everything! You can even change the colours using CSS, however RefTracker has a simple Colour scheme editor that controls the major colours used by both your staff and client interfaces (so the purple hyperlinks, for example, can be easily changed to another colour using that editor.
- RefTracker’s forms use responsive design so there is no need to do anything special about that, but if you want to, you can edit mobile.css. There are also separate headermobileclient.htm and footermobileclient.htm files that you can edit.
- It is also possible to change some of the content of the other client interface pages using text files and literal changes, but essentially the content presented on these pages is controlled by RefTracker.
However there is a large range of features that allow the client interface header and footer to be customised to meet your specific needs. They include:
- Customisable headers and footers for the staff and client interface pages with variables available for inclusion of RefTracker features in your custom header and footer files.
- Customisable header and footer that is automatically used when the client pages are presented on a mobile phone.
- Separate headers and footers for each available language translation.
- Flexible options for hiding and displaying the header and footer.
- The ability to define the header and footer to be used through URL parameters allowing one RefTracker system to use multiple headers and footers (different headers for different departments, for example).
This page provides details of the features you can use to achieve all these things. It relates to the client interface only. See Customising the staff interface if you need information about customising the staff interface header/footer.
There are a lot of features you can use, so, at the end of this page we provide a worked example of how simple it is to achieve a header, footer and css that makes your RefTracker pages match your corporate web pages – see Header customisation – a simple worked example
Note that RefTracker uses responsive design so there is no need to customise simply to achieve different formatting according to the size of the screen in use.
How to customise the client interface Header and/or Footer
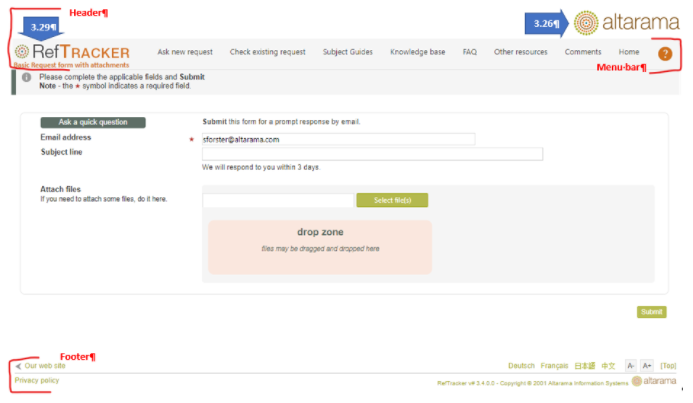
If you’d just like to modify what shows up in the standard header of your RefTracker client pages, as shown below, then you can change the images in that section using the 3.26 and 3.29 parameters, and even remove the menu’s or the full header/footer using parameters described in this page.
However, further flexibility in relation to headers and footers is provided further down this page at Additional functionality for hiding and displaying Headers/Footers, and below, including important information about being able to include css (stylesheets) to achieve the look that you want for all of the RefTracker client pages (see the section below css stylesheets for client interface style and fonts).
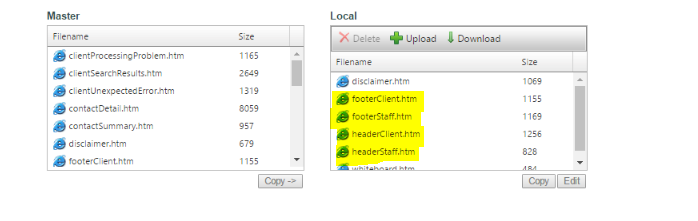
If you need to create a custom header and/or footer for your RefTracker client interface you should start by going to the Template editor (text) under the Administration Utilities menu and copying the desired files from the Master directory to the Local directory. The relevant files are (examples are for English):
- /template/text/master/en/headerClient.htm
- /template/text/master/en/footerClient.htm
You can then edit the header and footer template files using the built in HMTL editor (at System>Utilities>Administration utilities>Template editor (Text)) or download a copy to edit locally on your computer (and upload it after editing). Note that each of the templates contain the head and body html tags that need to be left in the templates. RefTracker will extract only the html contained between the body tags of these files to use in the header/footer, so place the HTML that will provide the layout for your customised header/footer, between these tags.
It’s important to note that you need to close any open HTML tags in this customized file. If you need to add any source links to JS files or any external data, you may want to do that in the head.inc file.
To add custom css see “Stylesheets for custom header and footer Colours and Fonts” further down this page.
When you edit headerClient.htm, the HTML that you provide will replace the RefTracker client interface header, including its navigation bar, so be sure that your new header provides all of the navigation links that your users will need (to your web site and to RefTracker pages like Check existing question).
NOTE that some header, footer, and colour changes that you make, may not show up in your RefTracker system until you log out and log back in in a fresh browser, or even until your system is restarted.
RefTracker information that can be included in your Header/Footer:
In creating a new header and footer template, there are several variables that can be inserted or removed to insert values known by RefTracker into your header or footer. The standard headerClient.htm and footerClient.htm files use many of these variables, providing an example of their use.
| Variable | Description |
|---|---|
| {page_apptitle} | Replaced by the image selected in Parameter 3.29 – the image usually found in the upper left of the RefTracker screen. |
| {page_pagetitle} | Replaced by the current page’s name |
| {page_help} | Replaced by the question mark icon and a link to the RefTracker Help |
| {page_logo} | Replaced by the image selected in Parameter 3.26 – the image usually found in the upper right of the RefTracker screen. |
| {page_topcontrol} | Replaced by the [Top] button used to jump back to the top of the RefTracker screen. |
| {page_languagecontrol} | Replaced by the language links to change the RefTracker user interface language. |
| {page_userdetails} | Admin Only – Replaced by the currently logged in user’s name, location, and currently selected availability icon. |
| {page_copyright} | Replaced by the RefTracker version number, Altarama copyright, and Altarama logo. |
| {page_home} | Replaced by the text and a link to your library’s website as defined in Parameter’s 1.5 and 1.6. |
| Turning the RefTracker menu bar off whenever this header is used | If you want to include your own menu bar in your header and so need to ensure that the RefTracker menu bar is turned off whenever this header template is used, add the following code to the CSS in your customised header template: #mbarDynamic{display: none;} |
Multiple Headers/Footers
Another option is the ability to specify an alternate header and footer in the URL. An example use for this functionality would be creating a separate header for each department. The library’s archives department could place their logo, name, etc. in a custom header while the main library displays the main library’s logo, name, etc. Using the same parameters previously mentioned to turn the header and footer on or off, you can alternatively supply the name of any .htm file in the /template/text/local/en/ directory.
To create a new template file to be used in this way, go to System>Utilities>Administration utilities>Template editor (text). Use that page to create a local copy of the headerClient.htm or footerClient.htm file, give it a new name (such as archives.htm used in the example below), and make the changes that you want to make. See the Template editor (text) section of the Administration manual Utilities section for details of the variables that can be used when editing these files.
Copy headerClient.htm and footerClient.htm, and rename them when you need to use this concept of multiple headers/footers.
| Variable | Description |
|---|---|
| Pheader=<filename> | Changes the Header for the current page so that it uses the htm file you specify as <filename>. |
| Pfooter=<filename> | Changes the Footer for the current page so that it uses the htm file you specify as <filename>. |
| Sheader=<filename> | Changes the Header for the user session so that it uses the htm file you specify as <filename>. |
| Sfooter=<filename> | Changes the Footer for the user session so that it uses the htm file you specify as <filename>. |
Examples:
- Change the RefTracker header for the entire user session:
- First use the Template editor (text) to copy and edit a template or upload a new template (must be a .htm file)
- In this example the new header is named archives.htm and is located in /template/text/local/en/. The smenu parameter turns the menu off (as this example archives custom menu includes its own menu). http://www.reftrackerurl.com/reft100.aspx?key=RefShort&sheader=archives &smenu=0
Note:
- This feature takes into account the language setting and directories. If you have more than one language enabled you will need to add the custom header to each language folder in the local directory.
- You can, and should, use these URL parameters with the email template links if you need to carry a different corporate theme through all of the Interactions with a client for a particular request type. For example, to use a special session header (in this case called archives.htm), for client interactions using the “manage” link in the Confirmation email, the html the email template would be:
<a href="{link_Check}&sheader=archives" style="font-weight: bold; text-decoration: underline; -ms-word-wrap: break-word;" target="client">Click here for options to manage this {label_question_no}</a></strong><br />(cancel it, amend it, add more information, or see its status)</span> |
It is not necessary to include the “.htm” in the URL query string when specifying the customized header file name.
Additionally, for those needing different headers for different client bases, we recommend that you set your default header and footer to provide no identification. This will ensure that if a client finds a URL that does not specifically have a header file associated with it, there will be no risk that they would see an inappropriate header/footer.
Template selection order
Mobile Header/Footer:Template Selection Order
RefTracker will attempt to find a template using a cascade that checks for templates in the following order:
- A custom template specified for the page in the querystring (pheader or pfooter).
- A custom template specified for the session in the querystring (sheader or sfooter).
- If a ‘phone’ then check for the headerMobileClient.htm template.
- Check for the headerClient.htm template in the appropriate language folder.
- If no template exists then an empty <div></div> will be added to the page.
The local/master and Language folder structure is also taken into account for each of the template checks above.
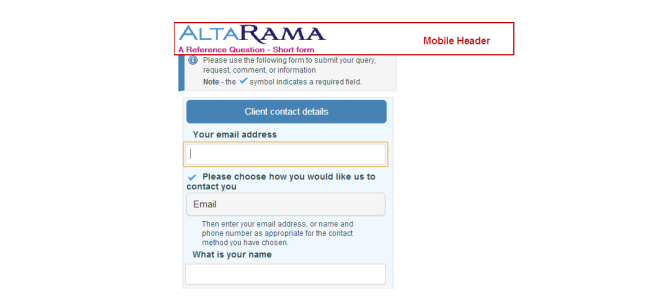
Mobile Header/Footer
RefTracker automatically detects when it is running on a mobile phone where the smaller format may require different header and footer layouts. In order to accommodate this, a separate header and footer are used on mobile phones. The mobile header and footer are found in:
- /template/text/master/en/headerMobileClient.htm
- /template/text/master/en/footerMobileClient.htm
The default mobile header only contains the Page title using the {page_pagetitle} variable.
The body also automatically displays using the css especially designed for narrow screens.
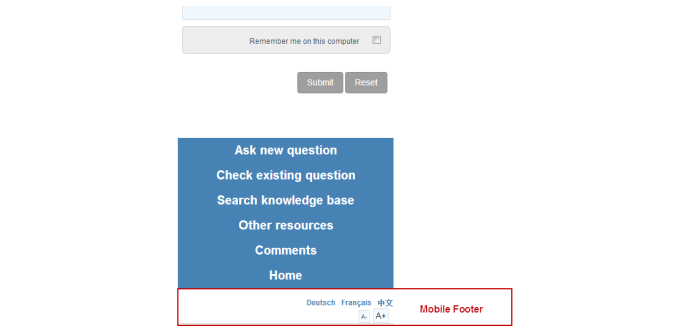
The default mobile footer only contains the Language control links using the {page_languagecontrol} variable.
The mobile header and footer can be edited using the same procedure used to edit the other HeaderClient and FooterClient template files as described above.
80.16 Include hand held resources: You can prevent the client interface formatting from being used, should you need do that, by using parameter 80.16 “Include hand held resources”.
Additional functionality for hiding and displaying Headers/Footers:
There are several methods for changing when the header, menu, and footer are displayed. These are especially useful for embedding forms into your webpages with an iframe. The following table describes the full suite of options for hiding (or displaying) the header, menu, and footer.
| Variable | Accepted Values | Description | |
|---|---|---|---|
| Show | Hide | ||
| extmode | 0 | 1 | Hides the Header and Menu for the user session e.g. extmode=1 turns OFF the header and menu bar |
| pheader | true/yes/1/on | false/no/0/off | Hides the Header for the current page |
| sheader | true/yes/1/on | false/no/0/off | Hides the Header for the user session e.g. sheader=0 turns OFF the header and menu bar |
| pmenu | true/yes/1/on | false/no/0/off | Hides the Menu bar for the current page. |
| smenu | true/yes/1/on | false/no/0/off | Hides the Menu bar for the user session. |
| pfooter | true/yes/1/on | false/no/0/off | Hides the Footer for the current page. |
| sfooter | true/yes/1/on | false/no/0/off | Hides the Footer for the user session. |
| pdevice | phone/1 | iframe/4 | “pdevice=1” or “pdevice=phone” forces the mobile header, footer, and layout for the page. “pdevice=4” or “pdevice=iframe” is designed for embedding forms in narrow iframes and will prevent the mobile design from showing. |
| sdevice | phone/1 | iframe/4 | “sdevice=1” forces the mobile header, footer, and layout for the page. “sdevice=iframe” is designed for embedding forms in narrow iframes and will prevent the mobile design from showing. |
Examples:
1. Hide the Header and Footer, but show the Menu for the entire user session:
http://www.reftrackerurl.com/reft100.aspx?key=RefShort&sheader=0&sfooter=0
2. Use extmode to hide the Menu but show the Header for the entire user session:
http://www.reftrackerurl.com/reft100.aspx?key=RefShort&extmode=1&sheader=1
3. Embed a form in a narrow iframe and force the mobile layout while hiding the header:
http://www.reftrackerurl.com/reft100.aspx?key=RefShort&sdevice=1&sheader=0
4. Embed a form in a narrow iframe and force the normal layout while hiding the header:
http://www.reftrackerurl.com/reft100.aspx?key=RefShort&sdevice=iframe&sheader=0
Note: In the examples above you don’t have to specifically use the third parameter; however, if you try example 1 and then example 2 in the same session you’ll notice that the footer is still hidden because we have not explicitly turned it back on.
Removing the Header, Menu, or Footer completely
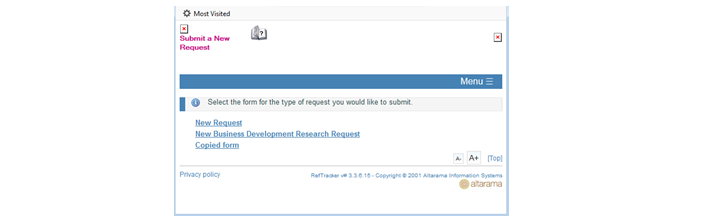
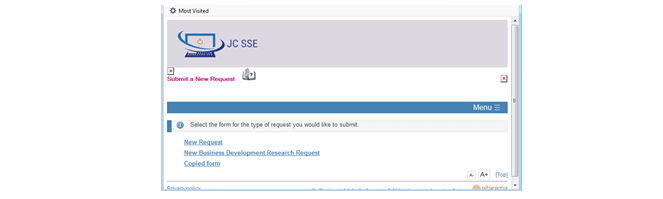
We do not recommend that you completely remove the header and footer for the RefTracker client interface as that would mean that when a user clicks on a link in a RefTracker email to manage their question, RefTracker will display without any corporate identifying information, like the image below:
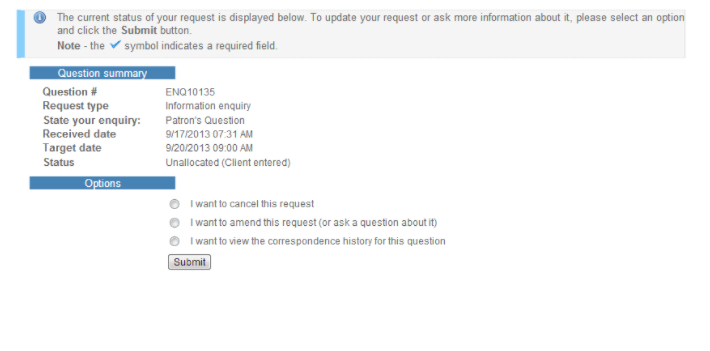
However there are occasions where you will want this to occur, such as if you are using iframes. To achieve this, you can customize the URL in the source of the iframe file to suit your needs. For example, if you used the following URL as your client-facing page:
http://lawdemo.altarama.com/reft100.aspx?key=Legal
You’ll see both the header and footer are included when it is called using this URL.
If instead, you add parameters from the “Additional functionality for hiding and displaying Headers/Footers” section above, you will achieve the result you want. For example this URL:
http://lawdemo.altarama.com/reft100.aspx?key=Legal&sheader=0&sfooter=0&smenu=0
Your iframe tag may then look something like this:
<iframe src=”http://lawdemo.altarama.com/reft100.aspx?key=Legal&sheader=0&sfooter=0&smenu=0″ />
More information about using iframes
There are several other places where you can find important information about using RefTracker forms with iframes:
1. Using it to display a RefTracker form in a “widget” style (click here for details)
2. Using iframebreakout to get around the third party cookie issue ( click here for details )
3. Creating a proactive reference widget (click here for details)
4. Use of responsive design and parameter 80.16 (click here for details)
CSS Stylesheets for client interface colours and fonts
Colours can be changed within RefTracker using the Colour scheme editor tool under System>Utilities>Administration utilities>Colour scheme editor, that does simple colour mapping. If you need more changes for your client interface pages, such as fonts and layouts, you can add custom css using the main.local.client.css file.
The recommended method for including additional custom CSS for the client interface is to provide your customisations in the “main.local.client.css” file that is included in the “/include/css/” directory that can be found at System>Utilities>Administration utilities>File upload/download.
A blank CSS file called “main.local.client.css” is included at the “/include/css/” directory. Download the file and edit it by adding any CSS changes that you want to make to the CSS you are seeing in the client interface. This file will be automatically included by RefTracker, as long you do not change its file name or location.
Additions to this file will supersede any equivalent css formatting contained in the default “main.reftracker.css” file, but will not effect the staff interface. For reference purposes you can download main.reftracker.css from System>Utilities>Administration utilities>File upload/download but please do not change it (any changes will be lost at the next upgrade)!
“main.local.client.css” is a persistent file and will not be overwritten by subsequent RefTracker upgrades. This is where all custom css for the client interface should be placed.
“main.local.staff.css” is also provided to allow for custom css for the staff interface, however there is no need to change it, and we highly recommend that you do not change it without first consulting with your RefTracker support representative.
“main.local.css” is also provided to allow for custom css for BOTH the client and staff interfaces, however there is no need to change it, and we highly recommend that you do not change it without first consulting with your RefTracker support representative.
An “email.local.css” file is provided for local css, that is protected from upgrades, for your email templates. It you need to provide custom css for your email templates, change it using the same procedure as described above for main.local.client.css.
Because email.local.css and main.local.client.css are added as the last CSS file, it is possible to override any of the existing RefTracker CSS with a style entered in one of these local files by specifying !important e.g.
.someCSSname{
Colour: green !important
}
What goes where?
At this point, you’re probably ready to begin modifying your templates. We’d suggest the following approach:
All custom CSS should be defined in the main.local.client.css file found by visiting System->Utilities->Admin Utilities->Upload/Download files, and then the /include/css directory. You should also define any javascript libraries you will be using on your custom pages (jQuery, etc.)
Any javascript needing to run post-page load should be put in the footer.aspx file. It should be some of the last code prior to the closing </body> tag. For example, if your organization makes use of third-party SEO, such as Google Analytics, you would include your designated Google Analytics script in this footer.aspx file. For more information about using Google analytics click here, or connect with your RefTracker Support agent for assistance with this if you need it.
Header customisation – a simple worked example
This example relates to the client interface only. It is not intended as an exhaustive explanation of all customising features, but shows what is possible with a few simple steps.The objective here is to add a page header which contains a custom logo on a coloured background with a clickable link.
Select a suitable logo image file
A suitable image can be any raster image file (e.g. those with a .png or .gif file extension)
This example uses the file JCSSE_logo.png
Here’s what it looks like in a graphics editor –

Upload the image file to RefTracker
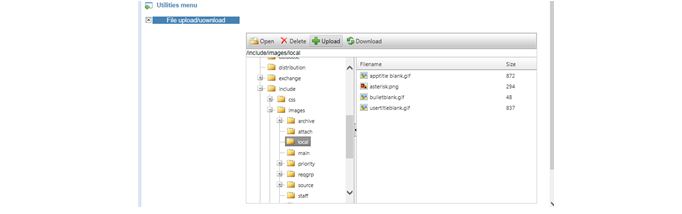
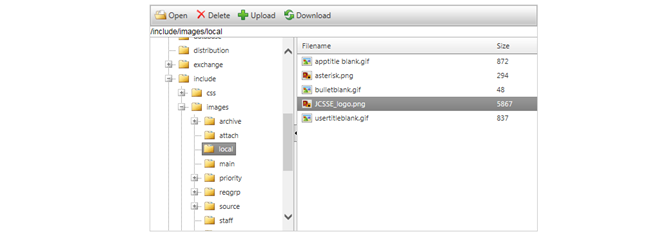
- From the RefTracker staff home page select the menu item System > Utilities > Administration Utilities > File Upload/Download

The file manager opens.
- In the left hand pane browse to /include/images/local.
The right hand pane will display image files already in your local RefTracker system – leave these as they are.
- Then click the Upload button.
- In the Upload dialog box, click the Select button and browse to the image file.
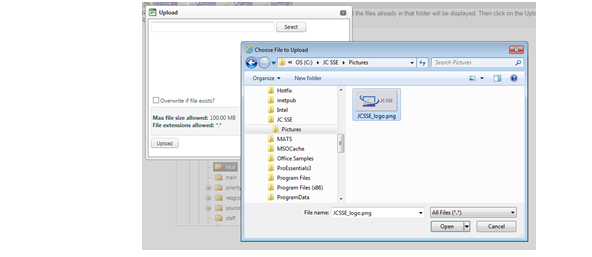
Click Open and the file name will be shown in the Upload dialog box.
- Click the Upload button,
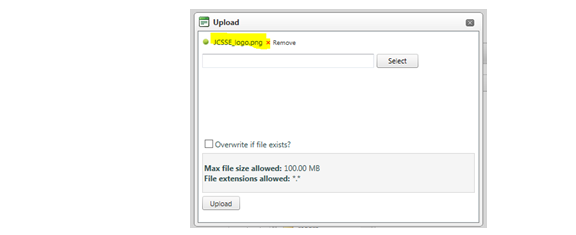
The file will be uploaded to your Reftracker ../include/images/local directory.
Select the header file to use
The simplest method is to use the default client header file already installed with your RefTracker system.
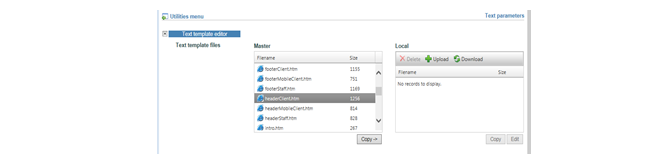
- From the RefTracker main menu select System > Utilities > Administrator Utilities > Template Editor (text).

The Text template editor displays the Master and Local template files on your system.
The Master files are a repository of available files. To use a file, it must be located in the Local repository.
- Select the headerClient.htm file and click the Copy-> button.
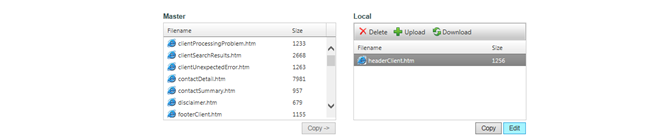
The headerClient.htm will be copied to the Local repository.
- Highlight this file and click the Edit button.
The text editor will be displayed showing the contents of the headerClient.htm file.
- Click the <>HTML button.
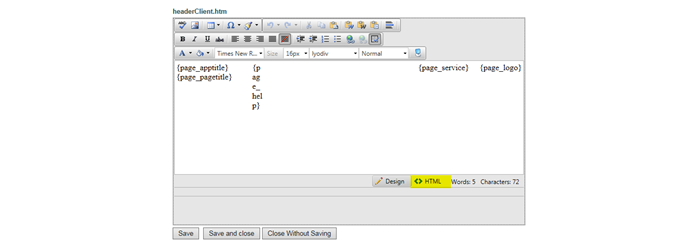
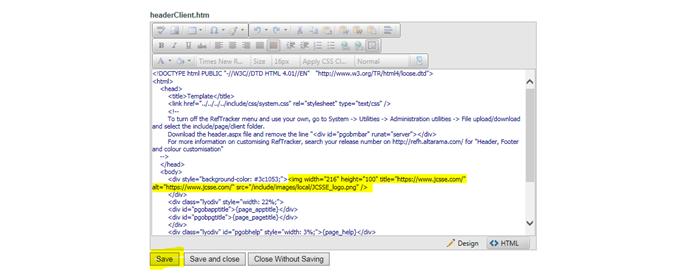
Add a background banner to the header
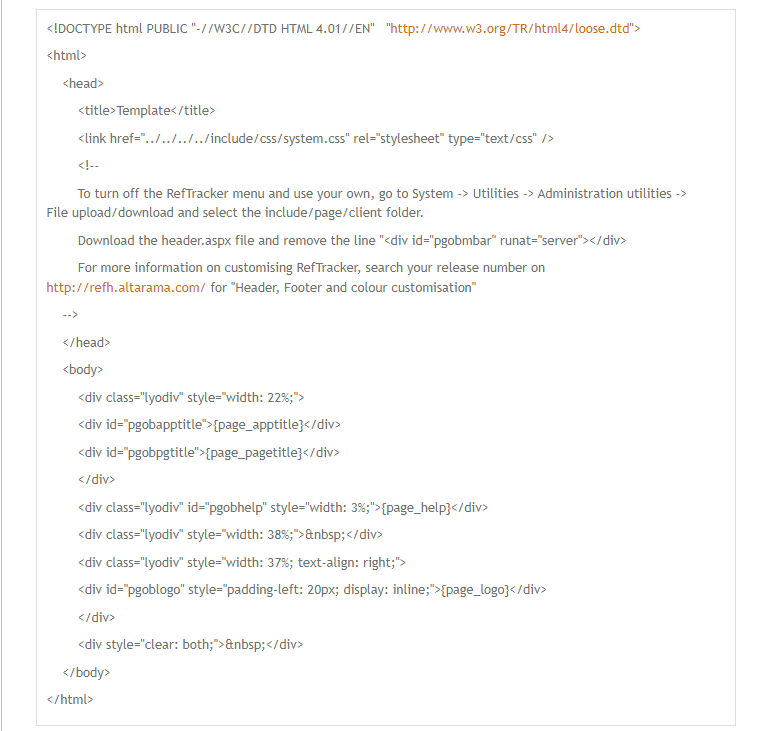
The text editor shows the HTML text of the headerClient.htm file.
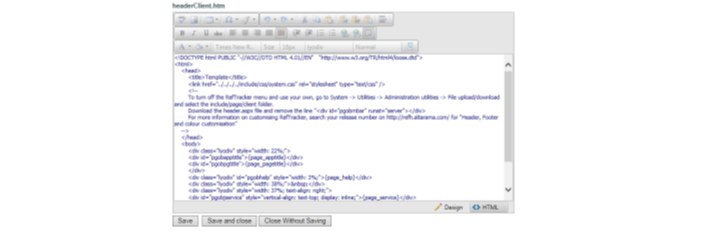
Here’s the full text…
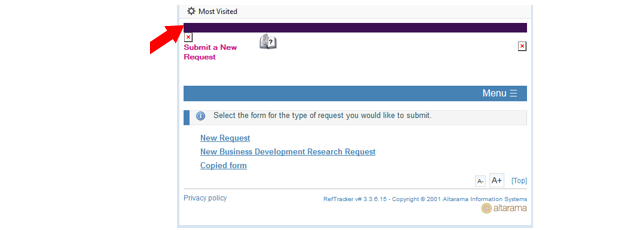
… and how the RefTracker client home page looks before editing (open this in a new browser).
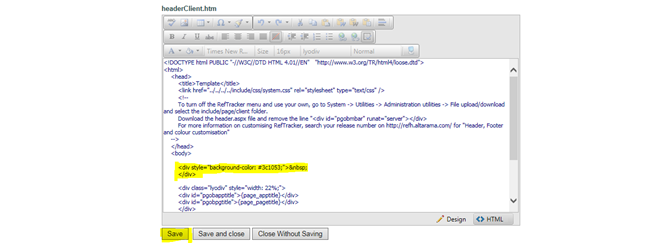
- Insert these lines into the HTML text…
<div style=”background-color: #3c1053;”>
</div>
- Click the Save button.
The   simply adds an empty line to the newly created div element (or section) so it becomes visible.
- Refresh the RefTracker client home page.
A purple banner will now be displayed at the top of the page.
The height of the banner will automatically resize once the logo image is added.
Add the logo image to the header
- Remove from the new div section and add this text…
<img width=”216″ height=”100″ title=”https://www.jcsse.com/” alt=”https://www.jcsse.com/” src=”/include/images/local/JCSSS_logo.png” />
width and height define the size of the image in pixels.
title defines the tooltip text.
alt defines the text that would be shown if the image file can’t be found.
src is the source of the image file i.e. the location it was uploaded to.
- Click the Save button.
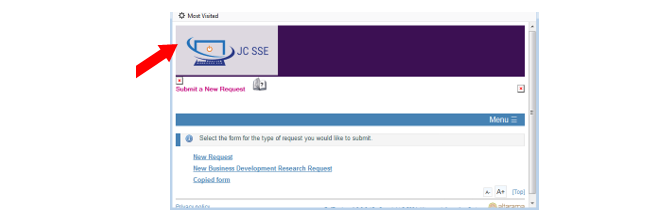
- Refresh the RefTracker client home page.
The logo image has been added to the banner.
Note that the div background has auto-sized to accommodate the image.
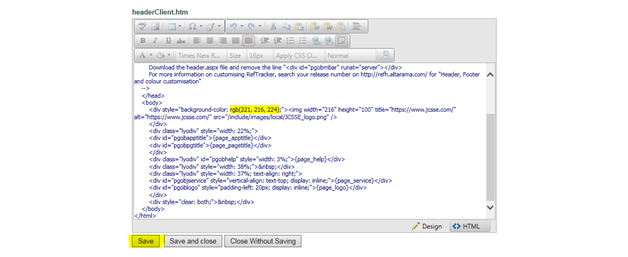
Match banner and image background colours
It is often desirable to match the banner colour to the background of the logo image.
If the colour code of the logo background is not known, use the colour picker tool in a graphics editor.
In this case the RGB values are …
Red = 221
Green = 216
Blue = 224
Note – If the original logo image is created with a transparent background this step will not be necessary, but this shows how colours can be manipulated.
- In the new div element replace #3c1053 with…
rgb(221, 216, 224)
- Click the Save button.
Note – the html editor will automatically convert the RGB colour code to a HTML colour code.In this case #ddd8e0
- Refresh the RefTracker client home page.
The banner and logo have now “merged” with the same background colour.
Add a clickable hyperlink to the logo
It may be desirable to create a link from the company logo that directs back to, for example, the company’s corporate website.
In this case http://www.jcsse.com/
Note – this is a dummy address used as an example and should be replaced with a viable web address.
- In the new div section, surround the img element with following two lines…
<a href=”https://www.jcsse.com/“>
</a>
- Click the Save button.
Here’s how the complete div element should look…
| <div style=”background-color: #ddd8e0;”><a href=”https://www.bbc.co.uk/”><img width=”216″ height=”100″ title=”https://www.jcsse.com/” alt=”https://www.jcsse.com/” src=”/include/images/local/JCSSE_logo.png” /></a></div> |
- Refresh the RefTracker client home page.
- Click the logo image and the browser redirects to the web address specified in the last section.