File upload/download
The File Upload/Download function is accessed under System>Utilities>Administration utilities and provides a way to upload and download files from all of the directories that RefTracker may need files uploaded to and downloaded from. Other Administrations utilities (Template, Text file and Web page editors) also provide file and upload and download functions for the particular types of files that they deal with.
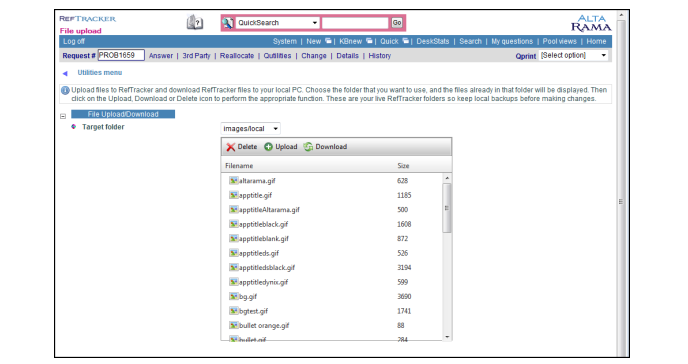
To use the File upload/download screen: Choose the “Target folder” (directory) that you want to use and the files already in that folder will be displayed. The RefTracker folders that you can upload to and download from using this tool are:
- exchange/import – where you can add files of data to be used by the “Batch load time and cost journal entries” function, and in the Relais subdirectory, where you will find the Relais mapping file. exchange/export – where you can download data exported from RefTracker using the Data export function.
- include/images/local – where you can replace images in your system (such as those used in the 3.x parameters – logo’s required image, etc.).
Files that you load into this directory can also be used in other places (such as client interface, and email template headers) by using their URL of https://<yourRefTrackerDomain>/include/images/local/<filename> - include/images/priority/local – where you can provide custom priority images (see the Priority code table for more details).
- include/images/reqgrp/local – where you can provide request group images (see the Request group code table for more details).
- include/page – where you can amend the head.inc and foot.inc files used by your client interface and upload any changes necessary to achieve the customised look and feel that your web designer wants.
- include/page/client – where you can amend the header and footer files used by your client interface and upload any image or css files that you need to support your amended header and footer.
- include/css – where you can load new or updated css files, when you need to change the colours used by RefTracker.
Put your custom css in email.local.css (providing custom css for email templates) or main.local.css (providing custom css for the staff and client interface pages) to protect it from being overwritten by software upgrades. If there is content in either of these files they will be picked up and used before the standard css.
Email.reftracker.css and main.reftracker.css are used for the standard css used by RefTracker and maintained by the RefTracker system, and should not be touched.
Email.custom.css and main.custom.css are used for the custom colours provided by the Colour scheme editor and maintained by the RefTracker system, and should also not be touched. - config – where you can load updated configuration files or amend them, with assistance from your RefTracker support representative
/licence – load new RefTracker licence files provided to you by Altarama, such as when you have increased your licence level
/exchange/EAD provides the configuration files used the EAD batch Export program
/exchange/MARC provides the configuration files used the MARC batch Export program
/exchange/RefTracker provides the configuration files used by the Batch Import, API and R2R processes
– see /exchange/reftracker/settings for the following files:
. APIFilter.xml controls the fields that can be received from the API
. ImportFilter.xml controls the fields that can be received from the Import process
. R2RFilter.xml controls the fields that can be received from the RefTracker to RefTracker process (for example, the Answer field is usually specified to be a field that is not brought into your system from an R2R transfer), and what fields should go to the “Other imported data” field if the label used for that field in each system is not identical should (for example the Question and Email address fields are usually specified to be mapped to those same fields in your system, even if the labels used for them in each system are different. Whereas other fields will be mapped to the “Other imported data” field if the labels don’t match as the different labels might indicate different uses for that field). See information about setting up the RefTracker to RefTracker process between different RefTracker systems in the relevant section of this help page.
. SystemReceiveFilter.xml controls the fields that can be received from all of the Batch Import, API and R2R processes
. SystemSendFilter.xml controls the fields that can be sent by all of Batch Import, API and R2R processes
/exchange/Relais provides the configuration files used the Relais Redirect to third party process.
/settings – amend the configuration files used by various RefTracker functions e.g.
. api.xml: domains that the API can be used with
. captcha.xml: parameters for the Catpcha that can be used by this system
. chart.xml: parameters for the graphs produced by the Statistics reports
/eraseClientData: client data fields that will be deleted by the Erase client data function
journalReport: columns to be included in the Journal entry reporting
/OpenURL: the parameters that RefTracker will recognise as OpenURL string parameters
/Mimemap: how the specified file types will be handled by the RefTracker attachment function.
The accept attribute set to 2 specifies that file type will ONLY be accepted as an allowed attachment for staff. 1 specifies that file type will be accepted as an allowed attachment for both end users and staff. Use 0 for any file type that might include harmful code but as 0 is default it is not necessary to include all harmful file types.
The default attribute will normally be 0. It is used to indicate when an extension is the default for that type. It should already be correctly set.
The inline attribute is set to 1 if that file type can be viewed by a web browser, otherwise 0 for files that need to be downloaded.
The mimetype attribute is found for each file type at https://www.solvusoft.com/en/mime-multipurpose-internet-mail-extensions/. Use octet-stream if there is no known mimetype for that file type. - public – where you can load new or updated public attachments, when any of these standard, reusable attachments need to be updated. Don’t forget to tick the “Overwrite if file exists” box if you are updating an already existing document!
- web/local – a location where you can store any files that you wish to web enable. They will be accessible as http://<YourRefTrackerDomain>/web/local/<filename>. The System>Utilities>Administration utilities>Web page editor function within RefTracker can also be used to create and edit these files.
To Download a file, click on the file you wish to download, then click on the “Download” icon. You will be shown the following dialog box.

After choosing Save you will be asked to select the location into which the file should be saved. If you want to edit the file and reload it back to RefTracker as a different version you will need to rename the file first!
To Upload a file, click on the “Upload” icon and an upload tool will display.

Clicking on Select in the Upload tool brings up a normal operating system file selection window that you can use to select a file from anywhere in your local network to upload. You can upload more files simultaneously by using the other Select buttons, or by clicking the “Add more files” button to add more select lines.If the file you are uploading already exists you must tick the “Overwrite if file exists” box. This is an important safety measure to ensure that you do not overwrite an existing file by accident.
To change your file selection, simply click on Select again.
The Remove function allows you to remove files from your selection – the selection is removed and the entire selection line is no longer displayed.
The Overwrite if file exists tick box provides protection by allowing you to specifically decide whether existing files should be overwritten.
This upload function will only allow you to upload files of types that are appropriate for the folder that you select. Valid file types and sizes for the folder you have selected to use are displayed above the Upload button.
Click the Upload button to upload your selected files. Files uploaded in this way are Virus checked according to the settings of parameters 9.81 and 9.90.
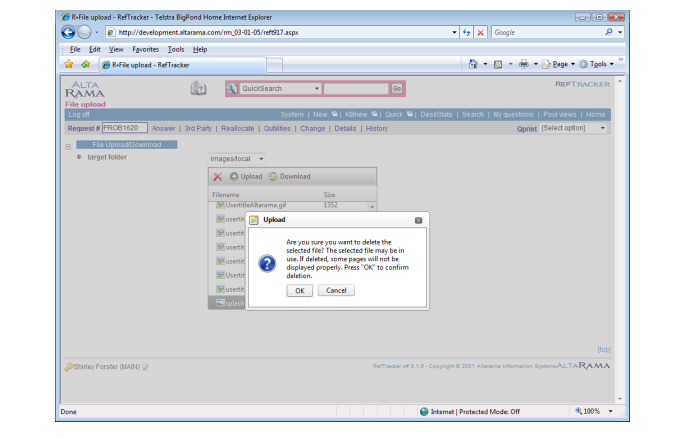
To Delete a file in your selected directory, click on the file you wish to delete, then click on the X Delete icon. You will then be shown an “Are you sure. . . ?” box. You are deleting a file from your live RefTracker system so please be very sure that you are deleting the right file. Local backups using the Download function are always a good idea before you make changes!
You can also right click on a selected file and select to Rename, Delete or Download. Importantly Rename is only available as a right click function.
To Rename a file, right click on it and select the Rename function, specify the new name and click on OK.
Exercise
Try Uploading a file and deleting it. Try Downloading a file.
When you are happy with your understanding of the functionality provided by this Upload/Download function, click on the link back to the Utilities menu and then click on Template editor (Email).