Manage reopen request
For each of your types of requests (Request forms), your System administrator will determine how the Reopen process should work when an email from the client or a third party is imported in relation to a closed request whether a Reopen request automatically reopens the request, or whether the request is not actually reopened until a staff member has reviewed the request using the “Manage reopen request” screen. Often they choose to use the “Manage reopen request” method where the request is not actually reopened until a staff member reviews the reopen request, because better statistics are provided by this option, as the close date will not be changed unless a staff member indicates it is appropriate to do so. If an email indicating that there has been a delay in delivery of the response email, or an out of office notice, or thank you, is received, you would not want the request automatically reopened.
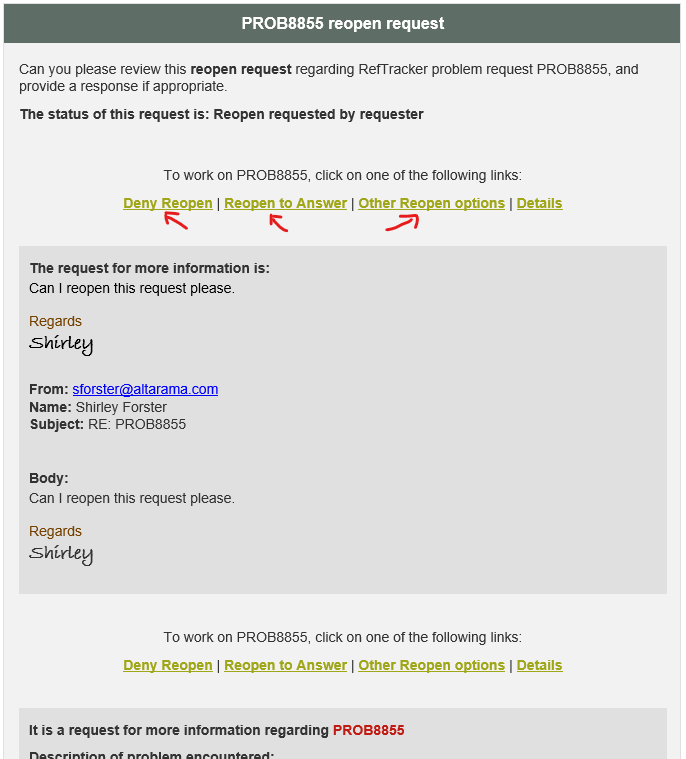
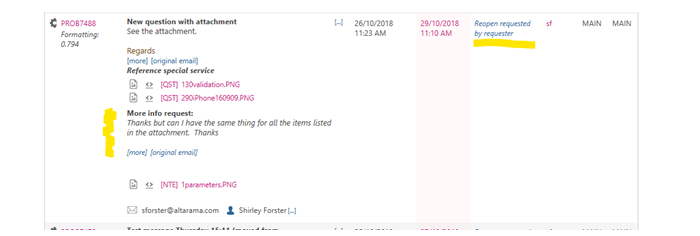
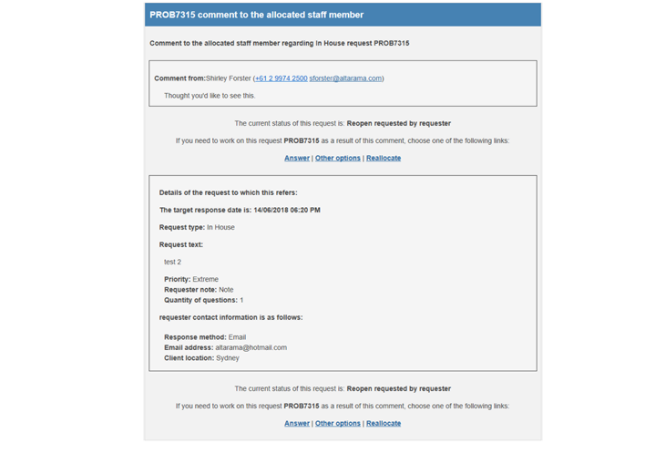
If this reopen method is implemented by your System administrator, reopen requests will appear at the top of the Open requests screen with a status of “Reopen requested by . . .” and an email advising that the request to reopen has arrived, can be sent to the staff member allocated the request as a result of the reopen request. The email can also go to the notification email address, if one has been defined for requests that are unallocated. Here’s an example of the email – notice the “Other Reopen options” link that takes the reader straight to the Manage reopen function described here.
Also notice the “Deny reopen” and “Reopen to Answer” links that provide one click access to the most common reopen options. See the Using the Notification of reopen request email heading below for more details about these other two options.
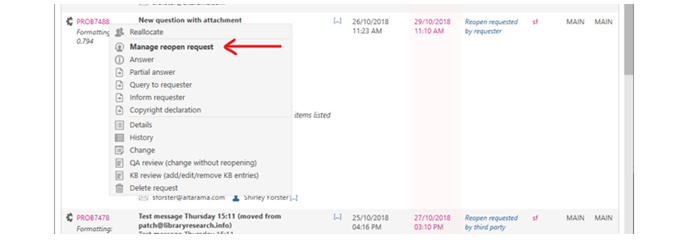
If you hover over the request number in the Open requests screen, you will see that a “Manage reopen request” option for requests in “Reopen requested by. . .” status, is the default action so you can quickly deal with reopen requests (whether they need to be reopened, reopen denied, handled as an evaluation, or handled as a new request). The text of the reopen message showing in the request summary of the Open requests screen, and in the staff email advising the reopen request, will facilitate this decision being easily made.
If you click the “Reopen requested by . . .” status link, you will be taken to the History tab of the Summary screen from where you can use any of the Answering functions such as Change), or find the “Manage reopen request” function under Answer or Actions for the special reopen options.
The “Manage reopen request” function can usually be used by Probation users and above, and can be found for requests in “Reopen requested by. . ” statuses, by hovering over the request number in the Open requests screen, or, if the request number has already been selected, under Answer in the request action header bar.
How to use the Manage reopen request function
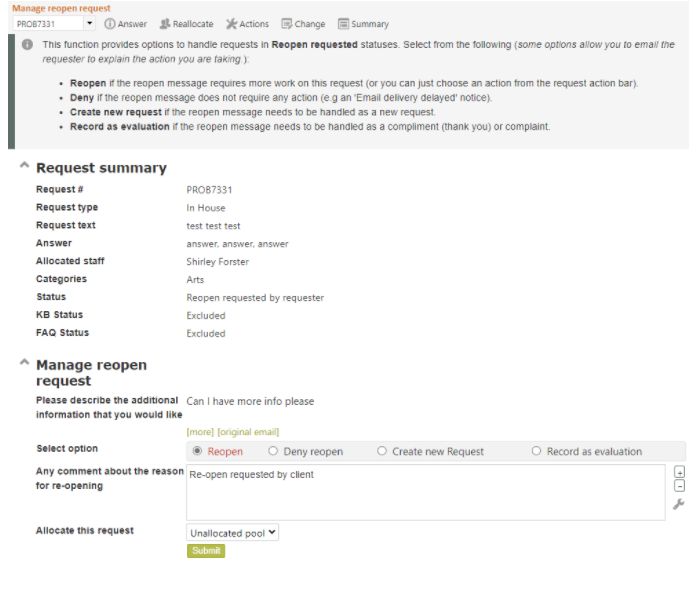
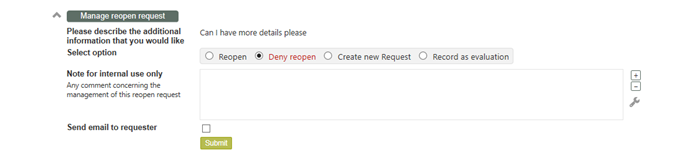
The “Manage reopen request” screen will display, and, offer options of Reopen, Deny reopen, Create a new request from the reopen request, or Record the reopen request as an evaluation.
Here’s the details of how to use each of the Manage reopen request screen options are:
Reopen
If the request needs to be reopened (because it really is a request for further information), just choose how you want the request allocated, and click Submit (because Reopen is already selected and allocation is already set to the currently allocated staff member), the request will be reopened, and you’ll be taken to the Answer screen for that request. Optionally you can provide a comment as to why you are reopening the request, and optionally you can reallocate the request to another staff member or to the unallocated pool. Once in the Answer screen you can provide a response, or, select any of the other functions that you want to use on that request from the Answer or Actions menu lists.
When a request is in a “Reopen requested by. . .” status, and the request is reopened, the system recognises that the reopen request is as a result of an action by someone other than the staff member and so it recalculates the Target date for the request using the date and time of the most recent “Reopen request” as the Open date and adding the Objective response time for the request form in use for that request (in other words the system resets the Target date as if it was a new request).
The “Allocate this request shows who the request is currently allocated to, as does the summary at the top of this screen.
If you allocate to an individual staff member here, that staff member will receive a “Reopen allocation” email to tell them the request has been reopened and is waiting for them to work on it.
Deny reopen
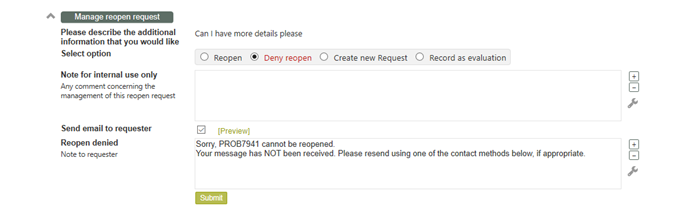
Select Deny reopen if the reopen request message does not require any further action (such as an “Out of office” notification). You can enter a note about why you are denying the reopen, if appropriate, and optionally send an explanation to the client by email.
When you click Submit, the status of the request will be changed from “Reopen requested” to “Closed”, so the request will disappear from the Open requests screen, but the fact that you denied the reopen request is recorded in the History.
If you want to send an email to the requester about their request not being reopened. Click the “Send email to requester” box and a box showing the standard message that will be sent to the requester displays. You can edit this message if appropriate.
System Administrators can change this default message by changing the AutoText QuickText entry for this “Deny reopen request” box.
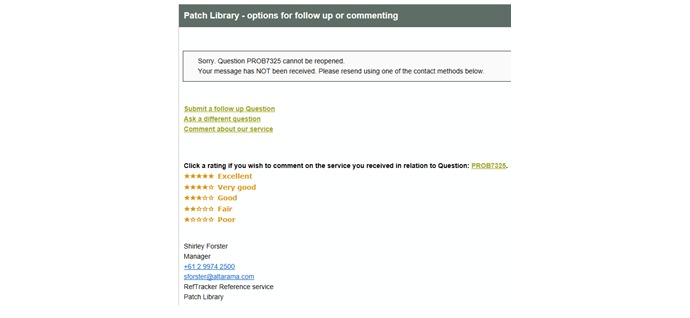
Clicking the provided [Preview] link before clicking Submit will show you the email that will be sent to the requester, if you leave the “Send email to request” box ticked.
The requester email provides links indicating other options to reopening, such as submitting a new request. Here’s an example of the email that can be sent to the requester:
Create a new request
Select Create new request when the reopen message that has been received is actually a new topic that needs to be handled as a separate request.
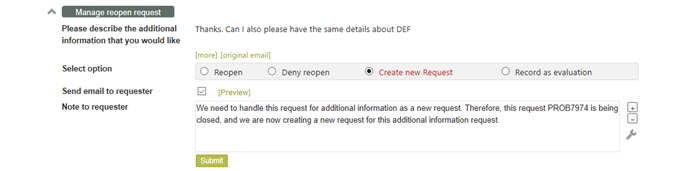
The system presumes that you will want to send an email to the client to let them know that the original request is being closed and a new request will be generated. You can amend the suggested message to the client, or elect not to send that message (by unticking the “Send email to requester” tick box).
When you click Submit on this screen, the “Reopen requested by . . .” status will be removed from the original request (effectively re-closing it without changing the closing date), and this email to the requester will be sent out using the Inform client template (i.e. that sends an “Update” email), if you have chosen to have it sent. You can see the email that will be sent by clicking the [Preview] link.
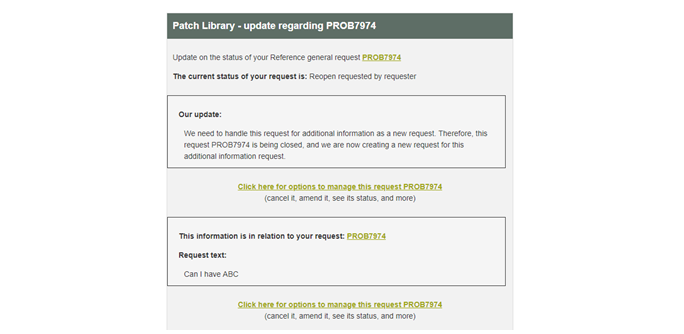
Note that this email is an update in relation to the original request and clearly indicates that it will be the original request that will be closed, not the new request (as that new request will not be created until the next step).
So, now that you have clicked Submit on the “Create new request” screen, your original request is closed and you will be shown a Create linked request screen that uses the same request form as the original request to which the reopen message applied, with the question text and client contact details from that original request copied in, except that the Question text field has been replaced by the text of the Reopen request message being managed here. Note that the reopen message text is preceded by the label for that text, just to make it obvious that’s what has been inserted. Make sure that you edit this text (and any other information in this screen), to suit this new request you are creating, such as selecting an appropriate Request form, Target date, and whether attachments should be carried forward.
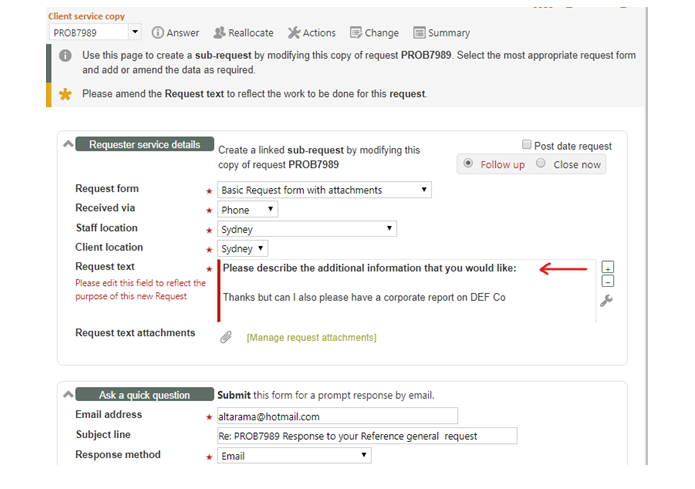
When you are happy with the details, click Submit and a new request will be created according to the details you have completed in this screen. The new request will be linked to the original request that was requested to be reopened (and is now closed), and vice versa, so that the linked relationship between them is reflected in the system.
If you choose to send a receipt confirmation email in relation to this new request, the requester will be advised of the new request number (just like for any other new request).
Record as Evaluation
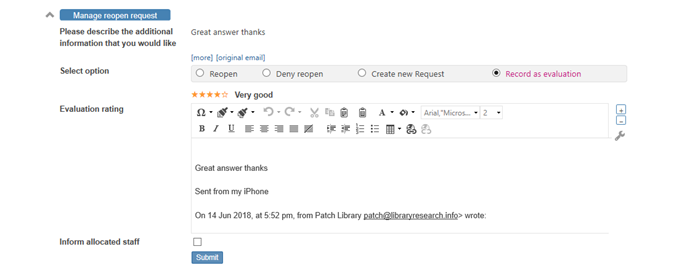
Select Record as evaluation if the update is actually an evaluation comment (a thank you or complaint).
You will be presented with the same five star rating and comment box that clients can use to provide ratings/comments, with the text of the reopen request automatically inserted as the evaluation note (but you can, and often will want to, edit it).
You can add a rating that reflects the comment made by the client, but you do not have to (and some organisations may ask you not to). If you provide a rating that matches the comment provided, the system will record that you entered this evaluation rather than the requester.
This option will be offered whether or not Evaluation has been allowed for the form (as the Evaluation option in the Request form’s Edit options relates to whether the end user should be allowed to provide an evaluation).
When you click Submit, the status of the request will be changed from “Reopen requested by . . .” to “Closed” after using this function, so the request will disappear from the Open request screen (and the Close date will not change).
If the request is not allocated to you, you will be given an option to let the allocated staff member know about the evaluation that was received.
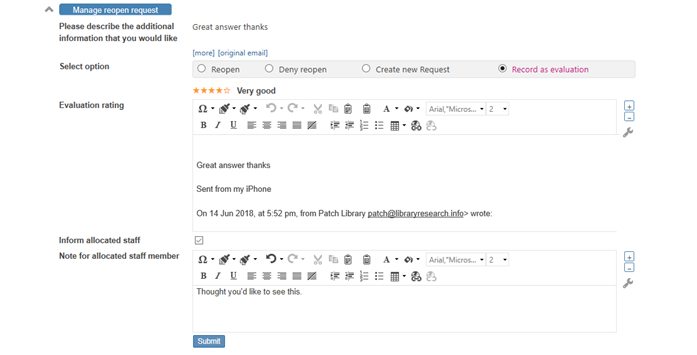
The email that the staff member receives looks like this:
If an evaluation comes in at another time (when the Manage reopen request is not showing in the Answer menu list), you can enter an evaluation on behalf of the requester by going to the Details tab and using the [Requester options] link (if “Allow client evaluation” has been allowed for the Request form in use).
Using the Reopen requested notification email
When communication is received in relation to a closed request and the request is put into “Reopen requested by. . ” status, the allocated staff member is sent an email letting them know about it. This email is designed to allow staff to efficiently deal with the reopen request.
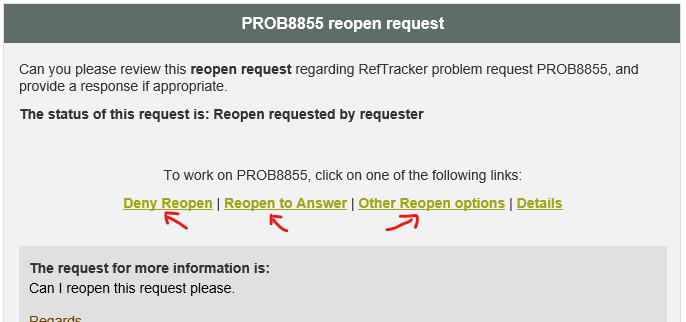
The Other Reopen options link provides access to all of the Manage open options as described above. However most commonly you will want to either reopen the request to provide further information, or to deny the reopen request. So the email provides one-click options to do those two most common actions.
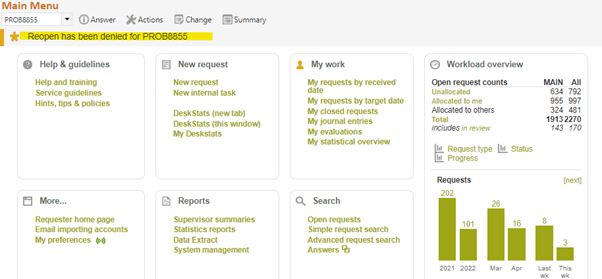
If you choose to use the Deny Reopen link, the reopen request will be denied and you will see a confirmation message in a RefTracker Home screen.
Note that this is a quick route to denying the request. If you want to send an email to the user about why you are denying the request you can use the full Deny function by choosing “Other Reopen options” in the notification email.
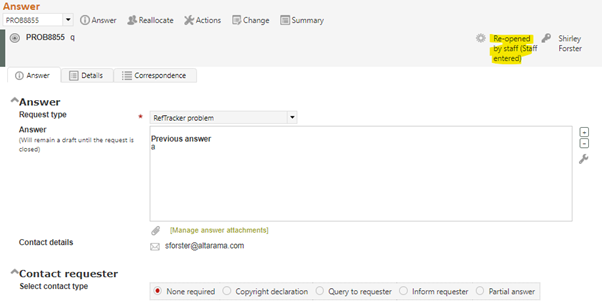
If you choose to use the Reopen to Answer link, the request will be reopened and you will be taken directly to the Answer screen for that request, so you can provide further information to the requester.
If you need to treat the reopen request as a new request or as an evaluation, use the Other Reopen options link, and then the “Create new request” or “Record as evaluation” links in that screen, as described above.