The staff logon screen
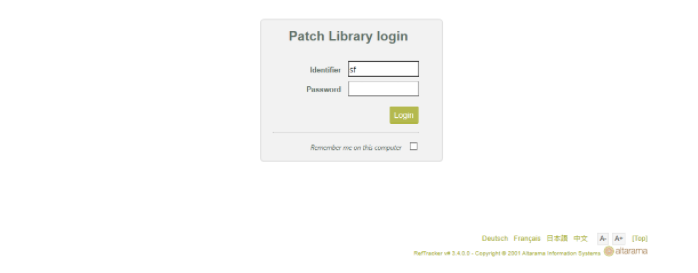
This is the RefTracker staff login screen. At your organisation you may be seeing it with different colours and logos, or without the “Remember me” option.
If Autologon has been set up for your system, SSO, or “Remember me” has been used, you may not see this screen as the logon will have been automatically done for you – you will have been taken to your intelligently selected staff Home screen (the last used of your Open questions screens or Home screen).
See the next section for details about the Remember me function.
Autologon can be set up by your System administrator so that it interfaces with your LDAP network log on (click here for more information about Autologon).
SSO (Single Sign On) can be set up by your System administrator if your organisation uses a Single Sign on regime (If your organisation uses SSO, System administrators should click here for more details about SSO use and setup).
If a user attempts to access any RefTracker screen without being logged on, they will be automatically shown this logon screen (however, if autologon or Remember me are configured for the user, this screen will be automatically completed by the system and the first screen the staff user will actually see is the screen they were wanting to access).
Initiating your RefTracker system
Your IT department (if you have a local system) or Altarama (if you have a hosted system) will provide your RefTracker system URL when your whole system is new.
The URL will usually look like http://<reftrackerDomainName>/staff.aspx
You should bookmark this URL, or, ideally, the URL should be incorporated into your library’s staff web pages, so that it can be easily utilised.
Staff can perform all of the actions that are required to respond to requests, as well as being able to enter requests on behalf of clients and record statistics for service provided on the spot, using this system.
This manual will cover all of these RefTracker staff actions. Regular users can perform all of the functions covered by this manual. Probation, General and DeskStats users can perform a subset – where a function cannot be performed by a particular type of user it will be clearly stated in this documentation.
We recommend that Staff users are given a training course specific to how they will use the system in your organisation. It should cover just the subset of actions that they will perform in your organisation. You are welcome to use this material (check out the word process in documents in the Overview help page), or other material for our support web site to create localised training courses.
Supervisor and Administrator manuals are also available.
Logging in not only identifies you to RefTracker so that statistics can be correctly attributed to you, but your sign on has an associated permission level that ensures that you have access to all of the appropriate functions to be able to perform your role, for example your sign on might identify you as a System Administrator who can change system settings, or it might identify you are a Probation user that needs their work checked before answers are sent out (see User types discussion earlier in this manual for more about permission levels).
As you log into RefTracker you utilise a RefTracker licence.
Full users can concurrently log in twice using the same signon.
ServicePoint users can only log in once.
Because logging in to this system at the start of this session uses a licence, you must also log off at the end of your session. Log off can always be found on the left of the System functions header bar. More information is provided about logging off, at the end of this manual.
Exercise
Log into RefTracker by entering the reference staff signon and password assigned to you by your System Administrator, or trainer, in the places provided in the login screen and press the Enter key or click on Login.
How you will initially receive your logon details
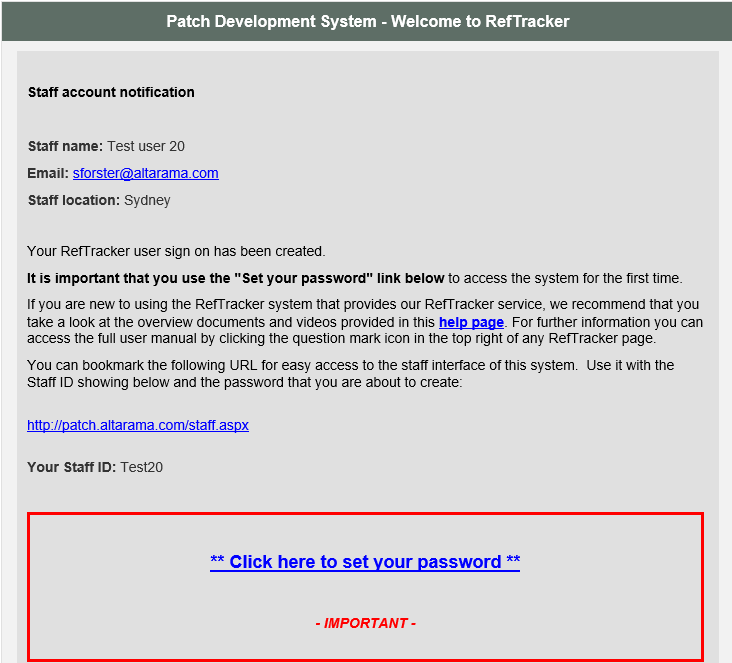
Whenever a new full RefTracker user signon is created, the user will receive a “Welcome email” from the RefTracker Service email address, with their signon details. Email addresses are not stored for ServicePoint users, so Welcome emails are not sent for new ServicePoint users.
Here’s an example of a Welcome email for new full users. They MUST use the “Set your password” link to validate their email address and set a new password, in order to enable their new signon. For security reasons this link expires in 48 hours, and becomes inactive once it has been successfully used. If a user tries to log in without first having used the “Set your password” link in the Welcome email , or after it has timed out, they will see a validation message that includes a [Resend verification email] link. This link will send a new Welcome email with a new 48 hour timeout period.
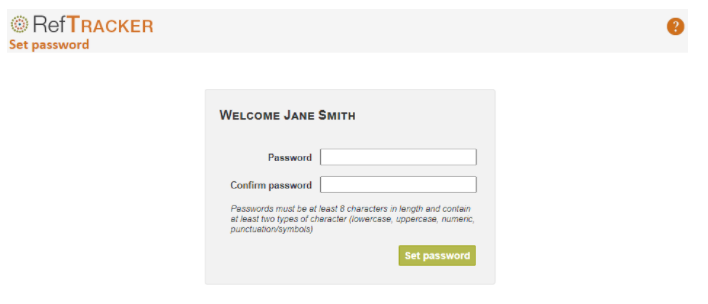
And here’s the screen that you will see when using the “Set your password” Link in that email. You need to provide a password and confirm it, and click “Set password” to log in for the first time.
Only once you have provided a valid new password using this screen, can you sign on with the URL and new ID you have been provided with in the Welcome email:
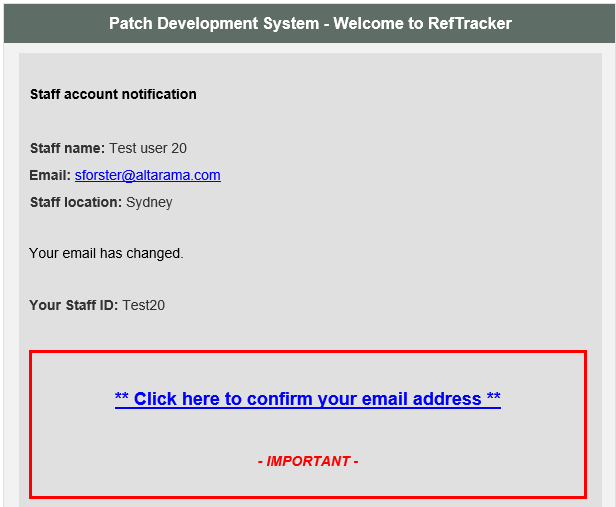
If your email address is ever changed you will receive another email like this. If you receive one of these emails you MUST: click the verification link in this email to be able to use your signon after the email address change.
If a user tries to log on after an email address change, or initial set up, without first verifying their email address, they will see a validation message like this:
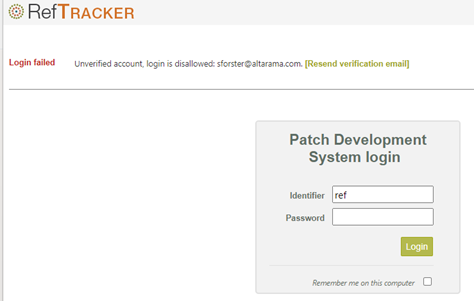
The resend verification email link makes the email address verification process easier when a user doesn’t happen to notice the initial Welcome email, or misses an email that asks for re-verification after an email address change (especially after they change their own email address). The verification process is important to ensure that only valid staff email addresses are in use. For security reasons the link can only be used once.
What you see after logging on
When you log into RefTracker it attempts to show you a relevant screen:
- If you log in from a staff function link in an email (like “Answer”) the system will attempt to take you to that function for the question # referred to in that correspondence.
- If you log in via the staff URL, the system will take you to your “home” page. You “home” page is calculated as
– the most recent Open questions screen that you used, if one has been used within the last week, otherwise the Home screen.
An exception to this is the DeskStats logon that will always go to the DeskStats screen as its first screen.
Remember me
If your System administrator has allowed it (parameter 5.20 and 5.21), a “Remember me on this computer” tick box will be appearing in your RefTracker staff login page. If you want to use this function click the “Remember me on this computer” box after providing your login details. The system then displays the prompt shown in the following screen print to ensure you understand that you should not use this function on public computers as it will provide access to the RefTracker staff interface, using your user details, to anyone who knows the URL for your RefTracker staff interface. To stop using “Remember me”, simply log in without ticking, or after unticking, the “Remember me” box and the staff login information stored on that computer will be removed as you log in.

When a staff member logs out, they are shown the login box with their id automatically inserted. If they are using “Remember me”, that tick box will be automatically ticked so the staff member can easily log back in again, retaining their Remember me details. However, automatically after one minute, or by the user refreshing the screen at an earlier time, the login box will revert to one that has no identifying information and the Remember me tick box unticked, so that any other user that comes along will have to provide a valid id and password to be able to access RefTracker and be able to change the cookie. For the ultimate security, when Remember me is enabled, staff should be trained to always close out their RefTracker window using the browser X after the login screen shows. Once the “Remember me on this computer” function has been activated by the staff member, each time they access the RefTracker staff interface, such as from a bookmark, typed URL, or staff link in a RefTracker email, they will be taken directly to their intelligently selected Home page (or the page specified by the link in the RefTracker email), as they will have been automatically logged in.
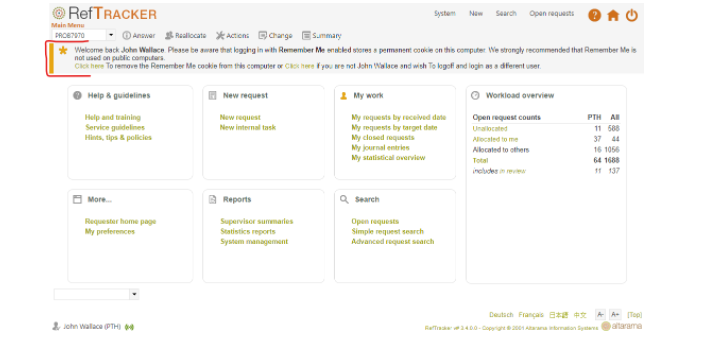
Note that, when this sort of automatic login has been used, the first page that the staff member sees after the login will provide clear advice about the user they have been automatically logged in as, as well as instructions as to how to remove the cookie and/or log in as a different user. This message will disappear as soon as the user moves to another page. If you unexpectedly see this “Welcome back” message, you have been unexpectedly logged off (and automatically logged back in) – please be sure to check that the last thing you entered has been saved.
In some browsers the staff member cookie will be deleted if you Delete your browser history (e.g.FireFox). The cookie created for your RefTracker system is applicable to that RefTracker system only, so if you use more than one RefTracker system, you can be sure that this RefTracker “Remember me” function will use the right login details for each system.
Cookies are specific to the browser that you are using, so if you tick “Remember me” for your RefTracker staff interface in Chrome, and then use the same system using Firefox, for example, you will have to save your “Remember me” setting separately for FireFox. Similarly if you use a desktop and a tablet computer, you will need to save your “Remember me” details on each hardware device.
Logging in when SSO is enabled
When RefTracker SSO is enabled and configured for a given user, and that user is within the IdP network (SSO Identity Provider network), browsing to the RefTracker reft998.aspx login page will perform a redirect to your intelligently selected RefTracker home page, bypassing the login page. Similarly if you are not already using RefTracker in your browser, and you use a link to any other RefTracker page (such as is provided in a RefTracker staff email) you will be taken directly to that page without the login page displaying.
SSO provides a corporate wide control of which staff can access your RefTracker application’s staff functions, and removes the extra step of having to separately log into RefTracker.
When accessing RefTracker from outside the IdP network the user will normally be taken first to an IdP login page which will then redirect to your intelligently selected RefTracker home page.
When RefTracker receives the response from the IdP it checks to see if the ‘user’ name in the SAML response matches any of the RefTracker user signons (by matching to the RefTracker staff number). If so the user will be logged in.
If there is no match then RefTracker checks to see if the IDP user name matches any of the Network Login values and if so, logs that user into RefTracker.
If there are no matches on either then, RefTracker will display the normal RefTracker login page.
When accessing RefTracker when not already logged into an IdP network the user will normally be taken first to an IdP login page which will then redirect to their intelligently selected RefTracker home page. Your IdP login page will not look like the RefTracker login page, for example it might look like this:

When you log off from RefTracker, you will be directed to the URL provided in parameter 5.7, if this has been set up by your System administrator, and if not you will see a RefTracker page that provides options to log back in:

Your system administrator needs to have set Parameter 5.12 to “Yes” for the “Log on as a different user” option in this screen to be offered (Click here for SSO setup information).
Password management and signon control
Your RefTracker system may have password management implemented (sys admins use parameters 9.30-34). If so, you will be required to change your password on a regular basis. If your password has expired, and you can successfully provide the old password, you will be shown the My preferences page that allows you to change your password. You will have to provide a different password before you can do any other action in RefTracker. If your password has expired, and the grace period has expired, you will be shown the My preferences page that allows you to change your password. You will not be able to go to any other page until a new password is provided.If your password has expired and the grace period has expired, and you do not have access to My preferences (System administrators can restrict this using parameter 2.10 for all Service level users, or by individually using the user’s signon Functions), you will not be allowed access and the System administrator will be automatically advised by email that you need to have a new password issued.
Your organisation may have defined a password strength that you need to use. If your new password does not comply you will be given guidelines as to what the new password needs to include in order to comply. There are also parameters that are used to control how many times a user can unsuccessfully try to log into your RefTracker system. This will prevent bad players from continually trying different logins and passwords to get in.
System Administrators can adjust these parameters at Parameters 9.35 and 9.36. This functionality is turned on by default but can be turned off.
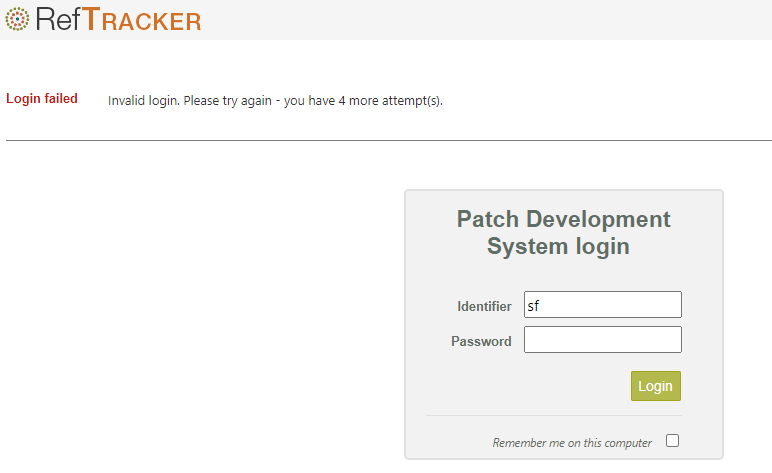
If a user provides an incorrect password they will be warned about the number of unsuccessful login attempts that remain before they will be locked out.
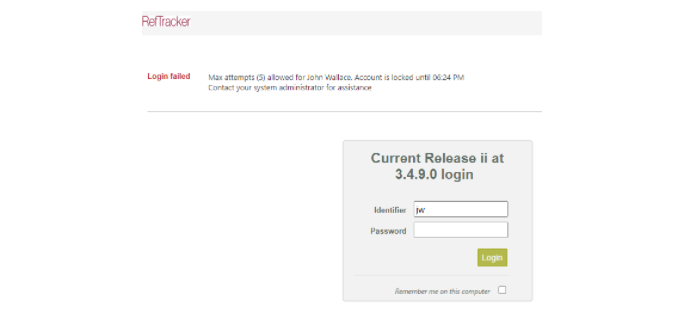
This means that if parameter 9.35 is five and parameter 9.36 is 4 hours, the user will be locked out for four hours immediately after a fifth unsuccessful attempt has been made within four hours of the first unsuccessful attempt.
In the example in the screen print below, the user’s fifth unsuccessful attempt was at 2:24pm, so, the jw user will not be allowed to log in, even if they provide the right password until after 6:24pm.
If the user had only had two unsuccessful attempts, without a following successful attempt, the unsuccessful login count would also be cleared at 12:58pm.
System administrators can also clear locked accounts by going to System>Users full and using Admin mode to unlock the user.
Logon failed options
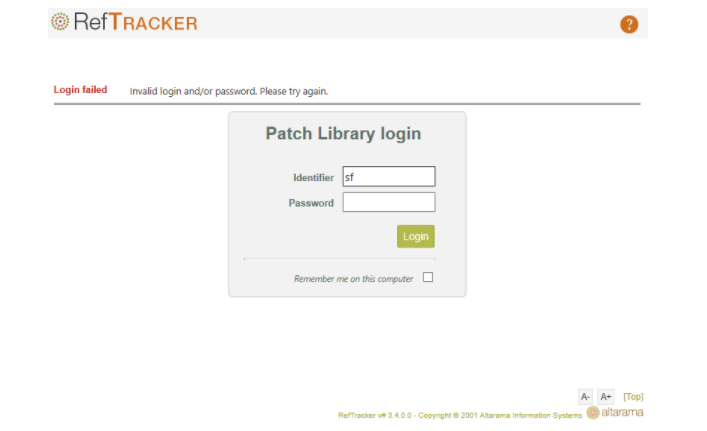
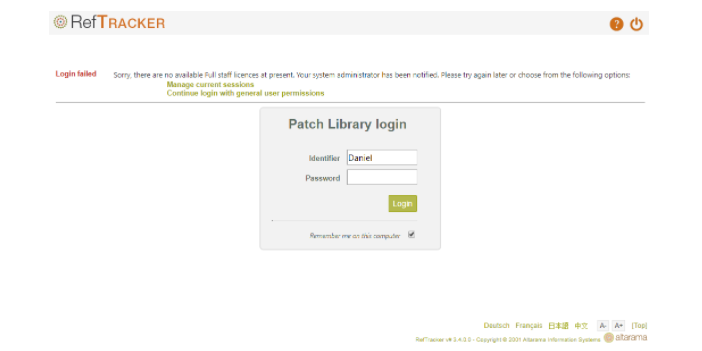
If your logon fails for some reason you will be advised why, and given appropriate options to resolve the situation, if there are any. Options may be:
– to simply attempt logging in again (incorrect login details, or expired password, for example).
– to use a “Manage sessions” link provided by the logon screen (see next section for details of how to use that screen).
– to use the “Continue login with General user permissions” link provided by the login screen. This option is only offered to Full level users and it means that even if there are insufficient licences to allow you to operate as a Full user, you may still be able to log in as a ServicePoint General user if there are unused Service Point level users licences available (System administrators control whether this option is offered using Parameter 2.0). When you use the link you will be able to use most of the features you normally use, as you normally use them, except that you will not be able to correspond with end users, or third parties, in any way. If you need to send an answer off, or close a question that you do not have permission to close while logged-in in this way, it will be sent to a Work reviewer or Supervisor who can then close it and send off the answer for you – better than being locked out entirely!
You may see the logon screen unexpectedly for a number of reasons:
– if your network goes down your session may be lost. When this happens, the next time you try to save a screen or a screen automatically refreshes, you will be presented with a logon screen. When this occurs, any information entered into your screen, but not yet saved will be lost.
– your System administrator may deliberately end your session (for example, if your system is short of licences and the administrator wants to allow another user in urgently). When this occurs, any information entered into your screen will have been saved and the logon screen you see will confirm this.
The Manage current sessions screen
If you have logged in more times than is allowed by your login (once for ServicePoint users, twice for Full users), you will be are offered the option to “Manage current sessions” to remove old session/s and allow a new session to be started. When you click on “Manage current sessions”, you will see a screen like this.

All levels of users can manage their own sessions. If you are seeing this screen it is likely that the sessions showing on this screen have been “lost” for some reason such as the Internet going down or you accidentally closing a RefTracker window without Logging off first.
System Administrators will be shown, and are able to manage, all current sessions for all users.
Ending sessions using this screen will close the session which drops the licence it is using and will allow that licence to be used again. Should the session happen to still be in use, the next thing Saved in that session will be saved but then the Logon screen will be displayed with a message saying that the session was ended and the last information was successfully saved.
Note that RefTracker contains an automatic time out feature that means that “lost” sessions will be automatically cleaned up after a System administrator determined amount of time, however when the timeout has expired, anything not saved in that session will be lost – the Logon screen will display – the unexpected display of the logon screen without any message saying that the “last information was saved” indicates the information was lost. This “Manage current sessions” screen allows sessions to be cleaned up “immediately”, and without the risk of any information being saved in them being lost if the session is still in use!
To end a session click in the tick box for that session (you can choose more than one if appropriate), then click on the “End session/s” button. If there is only one session to end you will then usually be presented with the Login screen again, and will be able to log in this time. However, if the Login screen does not display, use the Log on link in on the left of the main header bar to go back to the Login screen and try logging in again.